April 6th, 2021 | Updated on June 29th, 2022
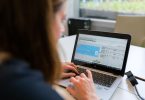
The pandemic situations created a stiff demand for webcams due to the home from the home trend. If you are also working from your home for the last few months, it is pretty evident that you need to join tons of video conferences.
However, you may have noticed that your laptop or PC’s webcam is not entirely satisfying due to poor picture quality, sickly colors, or a wrong camera angle.
If you are looking to elevate the video calls’ quality than the one on PCs or Mac, you are at the right stop. Here we will disclose the various methods to use your DSLR as a high-resolution webcam.
Although you can employ your phone as a webcam and save your time from setting up the DSLR, you may not get a high-quality resolution which will spoil your experience.
In this scenario, using a DSLR as a webcam is the best option. However, setting up a DSLR and connecting it to use as a webcam can often be challenging.
Most users face tons of issues like out-of-sync audio and much more. Well, no more worries as we present you the complete guide to set up your DSLR as a webcam.
While we will not recommend a specific camera, any model of DSLR does the work for you. Setting up your DSLR with your PC, you can look like the most presentable person in those zoom and Skype meetings.
Especially if you are a professional photographer and wanted to impress the client. Here is how :
DSLR Vs. Regular Webcam
DSLR images give you instant gratification with their high-resolution and detailed images when it comes to image quality.
The picture quality is much superior in DLSRs in comparison to even the most expensive PCs. DSLR marks its superiority offering the users tons of options to design the video quality or the image quality as per needs.
However, in terms of power, the DSLR batteries may drain much quicker than the PC webcam. This may restrict you from attending those long video conferences.
Therefore, to overcome this problem, you can have hands-on backup batteries to replace the drained-out ones.
Methods to Use DSLR as Webcam

Method 1 – Use the SparkoCam
SparkoCam is one of the most popular software that allows users to turn their Nikon or Canon cameras into webcams for recordings, video chats, conferences. Here are the steps to use SparkoCam to use your DSLR as a webcam :
- Step 1: Download and Install the SparkoCam software – Simple download the installation package of SparkoCam and install it.
- Step 2: Connect Your DSLR with the PC using a USB cable – After you have successfully installed the SparkoCam software. Now you need to plug-in your DSLR’s USB cable into your PC.
- Step 3: Switch On the Camera – Once the computer recognizes the camera, a notification will pop up, stating your camera’s details.
- Step 4: Launch the SparkoCam Software – Now start the SparkoCam software and move to the device tab and select your camera model checkbox to change your camera into a webcam. If you have connected a single camera with your PC, the SparkoCam app will automatically detect it. Or else, if you have added multiple cameras, you can select the required one manually.
- Step 5: Choose Your Target Application to Use SparkoCam Virtual Webcam – In this step, you need to configure your target application in which you want to use the webcam. For instance, to configure Zoom, you must open the select webcam setting and configure SparkoCam Webcam.
Although using SparkoCam software is a good option, the free version of the software includes a watermark on all videos, which can hamper your videos’ appearance. However, you can upgrade to the paid software to explore more features of the software.
Method 2 – Use Sony or Canon Softwares
In case you own a Canon or Sony DSLR, it’s pretty easy for you to use them as a DSLR. Both these cameras allow the users to connect to a PC as a webcam.
All the users need is a USB cable. Simply download the EOS Webcam Utility Beta for Canon cameras and Imaging Edge Webcam for Sony cameras.
Once you have installed the applications and plugged-in your camera, change it to movie mode and set the camera input in Skype, Zoom, and other apps.
Method 3 – Connect Your Camera Using HDMI For Incredible Resolution
This is one of the most convenient ways for DSLRs that output clean HDMI signals. This method is suitable for both PC and Mac users.
To start, you need an HDMI cable to blend out the live image from your camera. You can have your hands on a mini or full-sized HDMI cable as per your camera model.
Now you will need a capture device like Elgato Camlink. Once you are done plugging your camera into a dongle, it will readily transform the HDMI signals into a USB signal to allow your DSLR to function as a webcam.
You will simply have to configure the camera into your video conferencing apps like Zoom, Hangout, or Skype.
How to Set Up Your Capture Device With DSLR
If you are hassling with the procedure of setting up your capture device with a camera, we got you. Here are the simple steps to set up :
- Connect your camera to the PC via USB cable.
- Connect the HDMI device to the capture device, like Elgato.
- Connect the USB cable to your PC.
- Install OBS software to adjust the video setting and other details.
- Use the camera setting menu to adjust the resolution.
- After installing the OBS software, quickly move to the Sources, Add and Capture device.
Conclusion
Once you have hands-on all the required components setting up a DSLR as a camera is much easier. Using SparkoCam is the most reliable way. However, you can also use the other ways to pick out the best that suits you.
Using a DSLR can save you from purchasing those overpriced webcams. You can enjoy a seamless videography experience with the high-quality resolution of the DSLR.
In case you encounter any difficulty while setting up the DSLR as a webcam, refer to the steps mentioned earlier.